

How To Put Frames Together To Create An Animation
How to Brand an Animatic

Karen Mc Guinness, Customer Success Specialist
-
Why are animatics used?
-
How to make an Animatic pace-by-step -
Tips & examples
Animatics define the timing for a piece of moving epitome. When used with a soundtrack, they are a quick and easy fashion to go a sense of a finished film. They're a key part of the pre-product procedure.
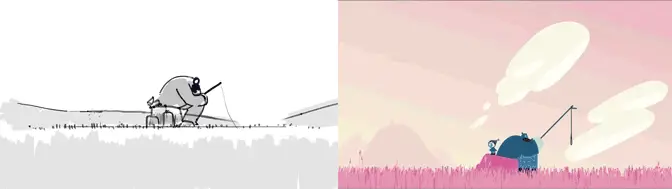
Animatics are created by playing a serial of images in club and adjusting the timing for each frame. Timing changes are used to create a sense of pace.
You tin create an animatic in Photoshop, Later on Effects, or in a specialist animatic software, like Boords.
Transform your storyboard into an animatic in a unmarried click
Notice out more
one,360video professionals signed up for Boords last week!
Why are animatics used?
1. To create consensus
The animatic may exist the kickoff time your teammates or clients meet what you've been working on. It's the perfect time to gather feedback and make changes before you begin the video editing process.
2. To make quick changes
An animatic should be seen as a work in progress, rather than a polished piece of art. It's much easier to bit a scene or grapheme at this indicate rather than later in the product process. With an animatic to hand, you'll salvage a lot of fourth dimension and heartache downward the line.
3. As a benchmark
Once yous move into the production stage, your animatic tin be used every bit a benchmark to refer back to. As an animator, it can be tempting to go lost in the details, but with your animatic as a stable reference signal, it'll be easier to stay on rails. The animatic should act as your North Star.
What software should I use?
Historically, animatics were fabricated by filming withal images, and then editing that film to the required length for each scene. Things have moved on, and now they're created using a dedicated animatic software.
If yous've already fabricated your storyboard in Boords, you tin quickly switch from storyboard to animatic mode with the click of a button.
Get the Ultimate PDF Storyboard Template Packet
10 professionally designed storyboard templates as set-to-use PDFs.

If you're not using Boords, you'll need to choose some software. Many people utilise an editing plan like Photoshop or Later on Furnishings for making animatics. Both of these are more than upward to the task. That said, the complexity of both tools means at that place can exist quite a learning curve if you cull to go down this route.
How to create an animatic in Boords
Step 1: Round up your images
Y'all'll need images to make an animatic. Animatics are made using sketches or 'scamps' - crude versions which bespeak what's happening in a frame. Your images just demand to convey action inside each scene. By and large, these are the same images used at the storyboarding stage.
Remember, the goal of your animatic is to create a crude version of your last piece, non the final slice itself. Avoid using 'finished' images. Focus on timing, not visual particular. There'll exist enough of time for that later.

In Boords, in that location are a few dissimilar ways to add images. Yous can drag some pre-prepared images onto the frame or upload them from one of the connected file storage services, like Dropbox or Google Drive.

If you lot haven't prepared any images notwithstanding, you tin draw directly into the frame with the cartoon tool. Or alternatively, you lot tin search the Paradigm Library by clicking Edit paradigm, then Stock illustrations & photos. Search for an image that works for you, then click Insert.
Step 2: Convert to animatic
Both storyboards and animatics use the aforementioned images, but there are some key differences betwixt the ii. Different a storyboard, animatics usually have subtitles, varying frame lengths and an accompanying audio file or soundtrack.

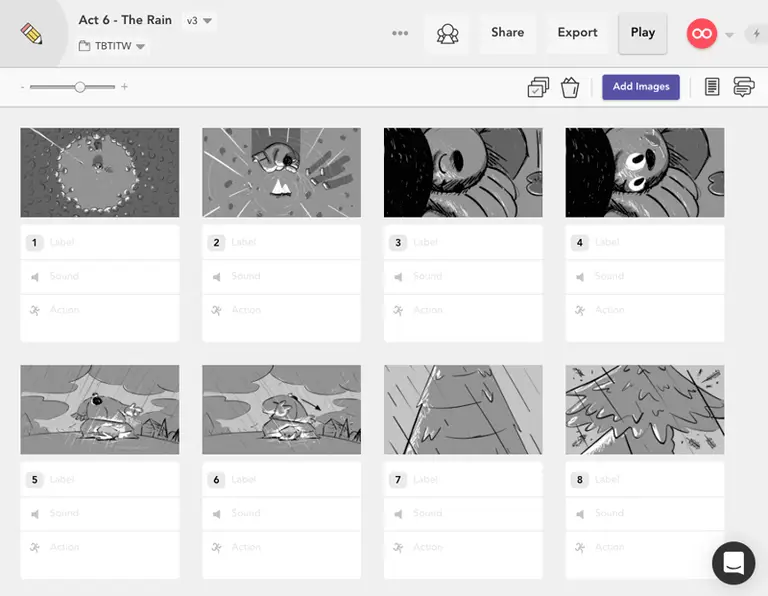
Click Animatic to catechumen your images directly from storyboard format to an animatic.
Your animatic will exist arranged into a timeline with the position of each frame marked by a grey dot.

Step 3: Add together audio
An audio track can be considered the colonnade of an animatic. It adds depth to the piece and gives the viewer a feel for how the finished product will catamenia. The sound track could be in the form of a voiceover, groundwork track or other specific sound furnishings.

Select Add sound to upload an audio file from your computer to Boords. In one case uploaded, you'll see a waveform of the sound to help guide you through.
Stride 4: Time information technology out
If you've added a voiceover or soundtrack, that will define the length of your animatic. Equally, you might have a pre-defined length. For case, videos for social media often have to be made to a given length.
One time the overall length is adamant, yous tin can begin setting the duration of each frame in a procedure known as timing out your animatic.

Grab the frame marking by hovering over it and the hold the Shift key. Keeping Shift held, drag the marking into place. When y'all place your cursor over the frame mark, you lot'll see the timecode of each frame.
Using the visual of the sound waveform will help to sync the audio with each frame.
An animatic's strength is in its flexibility; they are not finished pieces. Therefore, it's easier to cut sections of your film based on feedback. If you lot have committed time and free energy into creating a finished blithe movie, cuts similar this are harder to make.
The in-congenital commenting feature in Boords makes the process of gathering frame-specific feedback much more manageable.
At this point, your animatic should exist right on rail for feedback.

-
Click Sharein the superlative-right of your storyboard. -
Copy the link. -
Ship this link to your team/clients for feedback.
They can leave feedback by adding comments to specific frames.
Step 6: Export to MP4
An animatic is a stepping stone. When you're happy with the timing of your film, you'll desire to move into production. Your animatic and so becomes the reference for your final pic.
Create and share Animatics online. Trusted by 150,000+ creatives.
At this stage, yous'll want to move your animatic into the animation software you lot're going to create your final piece in. Boords allows you to export animatics as MP4 files and also has an Adobe After Effects plugin, which will enable you to import timed out animatics directly into your project.

To export to MP4, select Download, and then Get-go New Render.
With an animatic in hand, you lot're in the all-time possible place to get-go animative!
BONUS: Tips & examples
Evidence character movement
Motility within animatics is shown using arrows. For example, this frame uses an arrow to indicate the small character jumping onto the large character's back.
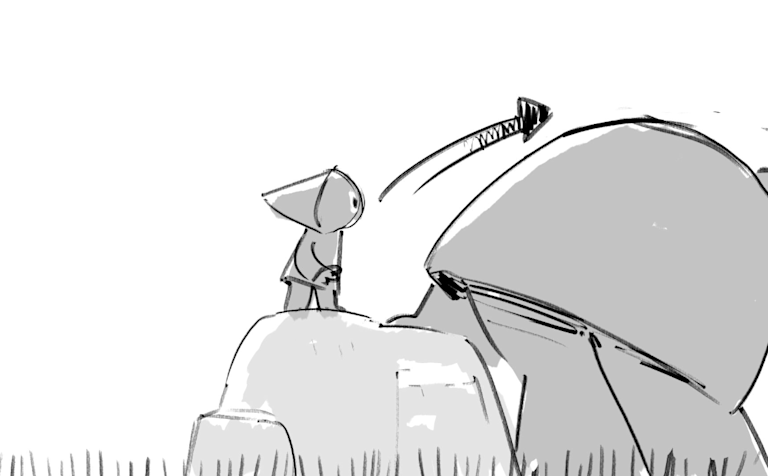
Using arrows stops you falling into the trap of animative besides early. The goal of an animatic is to create a full general sense of timing, and so stay away from granular animation references. Arrows are your friend.
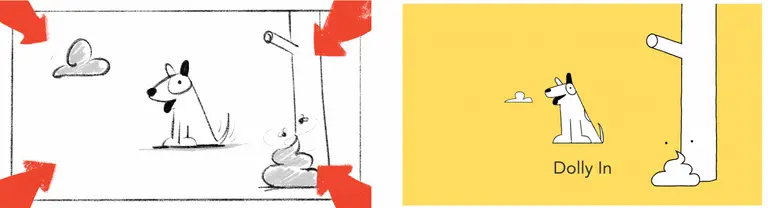
Bear witness camera movement
Arrows are also used to indicate photographic camera moves, like this dolly out transition (as used in the famous Jaws scene). In that location is a world of directional techniques out there merely employ them sparingly.
Give the viewer space
Some images take time to process. You may choose to use a longer frame duration if you're showing the audition a particularly complex scene. Holding a niggling longer on a frame will give them fourth dimension to take in details they may otherwise miss.
Source: https://boords.com/animatic/how-to-make-an-animatic
Posted by: mckaysoleass.blogspot.com
0 Response to "How To Put Frames Together To Create An Animation"
Post a Comment